Skip to content

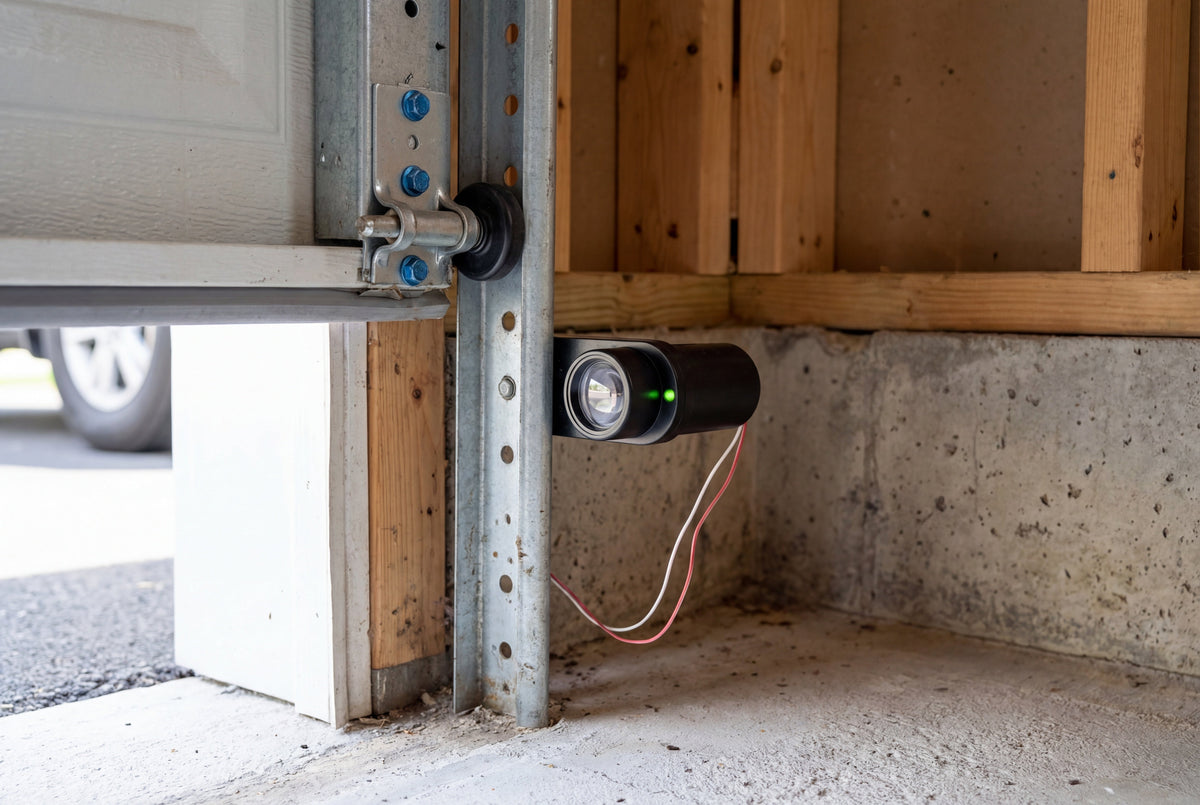
Your door starts down, travels a foot, stops, and rolls back up. Before you order a part, look at the two small lights mounted near the floor.
In most cases they will point you at the fault before you fetch a ladder. Often the repair costs nothing, and when it does cost something, the lights narrow down what you need to buy.
What the amber and green lights mean
First, why the sensors can stop your door at all. Under Consumer Product Safety Commission rules, residential openers manufactured on or after January 1, 1993 must meet the entrapment protection requirements of UL 325, and the revised standard calls for an external device: photoelectric sensors like these, a door edge sensor, or another giving equivalent protection. On an opener that relies on the eyes, a faulted pair is designed to stop the door closing.
One eye sends an invisible infrared beam across the opening and the other catches it. They mount on each side of the door, usually on the tracks. The CPSC describes an electric eye going 4 to 6 inches above the floor, and LiftMaster's instructions put the beam no higher than 6 inches.
The two eyes carry different colored LEDs, so seeing two colors is correct and not a fault. The sending sensor has an amber LED. The receiving sensor has a green one. What matters is how each light behaves.
-
A steady glow on both eyes: the beam is intact and aligned, which is the only state the opener will accept before closing the door.
-
A flickering LED almost certainly means alignment. Chamberlain describes a flicker as typically a misaligned or obstructed sensor, so start there rather than reaching for a screwdriver.
-
An LED that is completely dark points somewhere else: no power is reaching that eye, or a wire in the run is cut or shorted. A failed sensor or a problem at the opener itself can also leave an LED dark, so treat this as a starting point and not a diagnosis.
One more clue comes free, though it varies by opener. On the models Chamberlain covers in its diagnostic guide, breaking the beam during a close makes the door reverse to full open and the lights flash 10 times, or click if no bulbs are fitted. Check your manual for the count yours uses.
Amber on, green flickering: alignment or something in the beam
This is the fault you will hit most often, and it is usually a nudge rather than a repair. Walk the beam line first, because the obstruction is often something you stopped noticing weeks ago.
-
A coiled hose or a bike tire parked a few inches into the opening.
-
Cobwebs across the lens: spiders like the warm plastic, and a dense web scatters enough infrared to break the beam.
-
Wipe both lenses with a dry cloth before you adjust anything. Road film looks exactly like misalignment.
If the green LED still flickers with a clear path, realign. Loosen the wing nut on the green receiving sensor, move the eye slowly until the green glows steadily, then tighten without shifting the bracket. A solid green is the manufacturer's own signal that the pair is aligned, so a slight flicker means it is not there yet. If it will not settle, repeat on the amber eye.
Check the bracket while you are down there. A bracket you can rock with one finger will throw the beam off however carefully you aim the eye sitting in it, and tightening one mounting screw fixes what looks like a sensor fault.
When the sun is the problem
Here is a pattern worth checking before you touch a bracket. Chamberlain lists sunlight shining into the receiving sensor as something that can block the beam from the sending eye, and the opener reads that as an obstruction. Direct sun is a likely cause when the trouble follows a repeatable time-of-day pattern.
The giveaway is the clock. A misaligned sensor tends to fail at any hour, while a sun-blinded one fails around the same time each day and then clears on its own. If that is your pattern, a shield is worth trying before a new sensor pair. LiftMaster sells the 041B0873 Sunblocker Kit for $24.99. Confirm it fits your sensor model before ordering, since the housings changed across generations.
It has a season to it too. The sun sits lower in fall, so a west-facing garage that behaved all summer can start reversing in October with nothing changed on the door.
Both lights dead: check the wire before the sensor
Two dark LEDs rarely means two dead sensors. It usually means power is not reaching them, and Chamberlain lists three causes: the sensors are not installed, they are not wired into the opener, or the wire to the sending eye is cut or broken.
Start at the opener terminals, where the color coding does the work for you. White wires go to the white terminal, white and black striped wires to the black terminal. Reverse those two and you get a different fault rather than a dead one. Chamberlain also gives two details that separate a lasting connection from one that fails in six months: strip the insulation back 7/16 inch, and tug every wire after seating it.
If the terminals look right and the LEDs stay dark, Chamberlain's troubleshooting steps include a short wire test: rewire the safety sensors temporarily with about a foot of wire, bypassing the long run along the wall. Disconnect power to the opener before you work at the terminals, and reconnect it only once the temporary wiring is made up. If the LEDs then come on steady, the wiring in the wall is at fault. If they stay dark, the sensors are the likely culprit, though the opener terminals or its logic board can produce the same symptom, so a technician is the next call rather than a second set of eyes.
Chamberlain's steps also include switching the sensor positions if the door still will not close, which moves a suspect eye onto known good wire. Follow the sequence in your own manual rather than improvising it, since the two eyes do different jobs.
Reading the code the opener is already showing you
Newer openers will name the fault for you, and the codes are more specific than most people assume. This applies to Security+ 2.0 openers manufactured after 2011 that have a yellow learn button and UP and DOWN adjustment arrows. The arrows flash a two part code, pause, then repeat.
|
Code |
What the manufacturer says it means |
Where to start |
|---|---|---|
|
1-1 |
Sensors obstructed, misaligned, disconnected, or a broken wire, for more than 4 seconds |
The LED chart above. This is the everyday sensor fault. |
|
1-2 |
Wires reversed, or a short between the white and black terminals, for more than 4 seconds |
The opener terminals, not the alignment. |
|
1-4 |
Sensors obstructed or misaligned for less than 4 seconds |
Something intermittent: sun glare, a web, an insect crossing the beam. |
|
4-6 |
A 1-1 or 1-2 condition exists and the opener was told to close |
Clear the 1-1 or 1-2 first. This code follows them. |
The gap between 1-1 and 1-4 is four seconds, and it changes what you look for. A 1-1 is a standing problem you can see. A 1-4 has cleared by the time you walk over, which is why sun glare and spiders land there. Codes differ by opener family, so read yours against the manufacturer's full diagnostic code list. Our guide to LiftMaster blinking codes covers the codes unrelated to the sensors.
When to stop adjusting and replace the eyes
The short wire test is the line. If a foot of fresh wire will not bring both LEDs up steady, realignment will not help either. Sensors also fail after a physical hit, after water reaches the housing, and after a bumper finds the bracket.
For LiftMaster and Chamberlain openers the LiftMaster 041-0136 Safety Sensor Kit covers both eyes at $32.99, and the LiftMaster 041-0365-000 kit at $38.99 adds brackets. Which one you want depends on the state of your existing brackets, and fitment depends on your opener model, so our companion guide to sensor kit compatibility walks through both. Prices checked August 2026 and subject to change.
One thing not to do, whatever a video suggests: do not bypass, jumper or defeat the sensors to get the door closed. Chamberlain is blunt that these are a required safety device that must be connected and aligned correctly before the opener will move in the down direction, and the reason is a door heavy enough to injure whatever is beneath it.
There is a controlled alternative on some openers. Certain models allow a constant-pressure close: you hold the button on the wall-mounted control down until the door finishes its travel, and a remote will not perform that override. Chamberlain notes that openers and replacement logic boards made after February 3, 2022 no longer have the feature. Use it to secure the building while a repair is pending, follow your opener manual, and fix the sensors.
If you would rather move the door by hand, understand what the emergency release does first. Pulling it disconnects the trolley from the opener so the door can be operated manually. Where you can, close the door fully before you pull it, because an open or badly balanced door can drop once it is disconnected. If the door is stuck open, feels unusually heavy, sits crooked, or will not stay where you put it, keep people and cars clear and call a trained door technician instead.
Frequently asked questions
What does it mean when one garage door sensor is green and one is amber?
That is normal. The sending sensor carries an amber LED and the receiving sensor a green one, so two different colors is how a healthy pair looks. What matters is that both glow steadily. A flickering green usually means the eyes are misaligned or something is breaking the beam.
Why do my garage door sensors blink?
A blinking or flickering LED points to a misaligned or obstructed sensor. Clear anything in the beam path and wipe both lenses, then loosen the wing nut on the green receiving sensor and adjust it until the green LED is solid rather than flickering. If it still blinks, adjust the amber eye the same way. A green that flickers even slightly is not aligned yet.
How do I know if the sensor is bad instead of the wire?
Chamberlain's troubleshooting steps include a short wire test. With power to the opener disconnected, rewire the sensors temporarily with about a foot of wire, bypassing the run along the wall, then restore power. If the LEDs come on steady the wiring is at fault. If they stay dark the eyes are the likely cause, though the opener terminals or logic board can look the same, so confirm before buying. Strip the insulation back 7/16 inch and tug each connection to check it is seated.
Can sunlight stop a garage door from closing?
It can. Chamberlain lists sunlight shining into the receiving sensor as something that blocks the beam from the sending eye. Direct sun is a likely cause when the fault follows a repeatable time-of-day pattern and clears after dark. Try shading the receiving eye before replacing anything; the LiftMaster 041B0873 Sunblocker Kit is $24.99, and you should confirm it fits your sensor model first.
Can I close the door if the sensors are faulted?
Never by bypassing or jumpering them. Some openers do allow a constant-pressure close, where you hold the wall-mounted control down until the door finishes moving, and a remote will not do it. Chamberlain notes that openers and replacement logic boards made after February 3, 2022 no longer have that feature. Use it only to secure the building while a repair is pending, and follow your own opener manual.
What does diagnostic code 1-1 mean?
Code 1-1 means the safety sensors were obstructed, misaligned, disconnected, or a wire was broken, for more than four seconds. Code 1-4 is the same fault lasting less than four seconds, which points at something intermittent like sun glare or a cobweb. Code 4-6 means a 1-1 or 1-2 condition already exists and the opener was told to close. These codes apply to Security+ 2.0 openers built after 2011 with a yellow learn button and UP and DOWN arrows.
How much does a garage door safety sensor repair cost?
Often nothing. Realignment, a wipe of the lenses and a reseated wire are all free. If sunlight is the cause, a sunblocker shield is $24.99. If the eyes have actually failed, a replacement kit is $32.99, or $38.99 for the version that includes brackets. The wire itself comes in the kit, so a broken run does not need a separate order.
Read the lights, then spend the money
Most sensor calls come down to four states: both steady, amber steady with green flickering, both dark, or a fault that clears before you reach the garage. Each one sends you somewhere different, and only one of them usually costs anything. Work the lights in that order and you will know whether you need a shield, a new pair of eyes, or five minutes with a wing nut.
If the eyes turn out to be the problem, check which kit your opener takes before ordering, because the part everyone searches for was discontinued. Our guide to safety sensor compatibility by opener model covers the 1997 cutoff and the one older sensor family the current kit will not replace. You can also browse the full range of garage door openers and parts if the opener itself is the next thing on the list.