Skip to content
A well-installed security camera system can deter threats, provide critical evidence, and increase client satisfaction. Whether you're managing a multi-site commercial setup or upgrading residential surveillance, professional-grade installation is key.
As a seasoned installer or systems integrator, you know that the difference between a mediocre and outstanding job often comes down to planning and precision. This guide isn’t for DIYers—it’s built for professional installers who need reliable, repeatable processes that work in real-world conditions.
This guide outlines expert steps for security camera installation, covering positioning, wiring, equipment setup, and troubleshooting—using industry best practices every step of the way. Think of it as your go-to CCTV installation guide whether you're working with a first-time client or upgrading a legacy system.
Pre-Installation Checklist
Before you drill or run cables, take time to plan. Here's what to confirm:
-
Site survey complete: Identify entry points, blind spots, and lighting conditions
-
Camera types selected: Dome, bullet, PTZ, wireless, or thermal based on coverage needs
-
Power sources identified: PoE switch, adapter, or NVR with built-in power supply
-
Storage planned: Cloud, NVR, or SD card—based on resolution and retention requirements
-
Permission granted: Confirm client authorization and property compliance (especially for multi-tenant or HOA-regulated spaces)
Conducting a thorough assessment helps reduce installation errors and ensures you're choosing the best solution for the environment. Your clients expect results—they're not just buying gear, they're buying peace of mind, and your job is to deliver both.
Best Practices for Camera Placement
Strategic camera positioning is the foundation of effective surveillance. Follow these security camera mounting tips:
-
Entry/Exit Coverage: Place cameras above main doors, gates, and garage access points
-
Perimeter Monitoring: Mount 8–10 feet high to avoid tampering, angled slightly downward
-
Avoid Backlighting: Don’t aim toward bright light sources; backlight ruins clarity
-
Overlap Views: Use multiple cameras to eliminate blind spots
-
Indoor Units: Position to capture main hallways, stairwells, or entry foyers
When working with indoor cameras, consider environmental factors such as HVAC vents, ceiling fans, or high-glare surfaces. For outdoor security cameras, weatherproofing and sunshield placement are key.
As a pro, your clients rely on you not just for setup—but for strategy. Use every install as an opportunity to show your expertise and protect their investment.
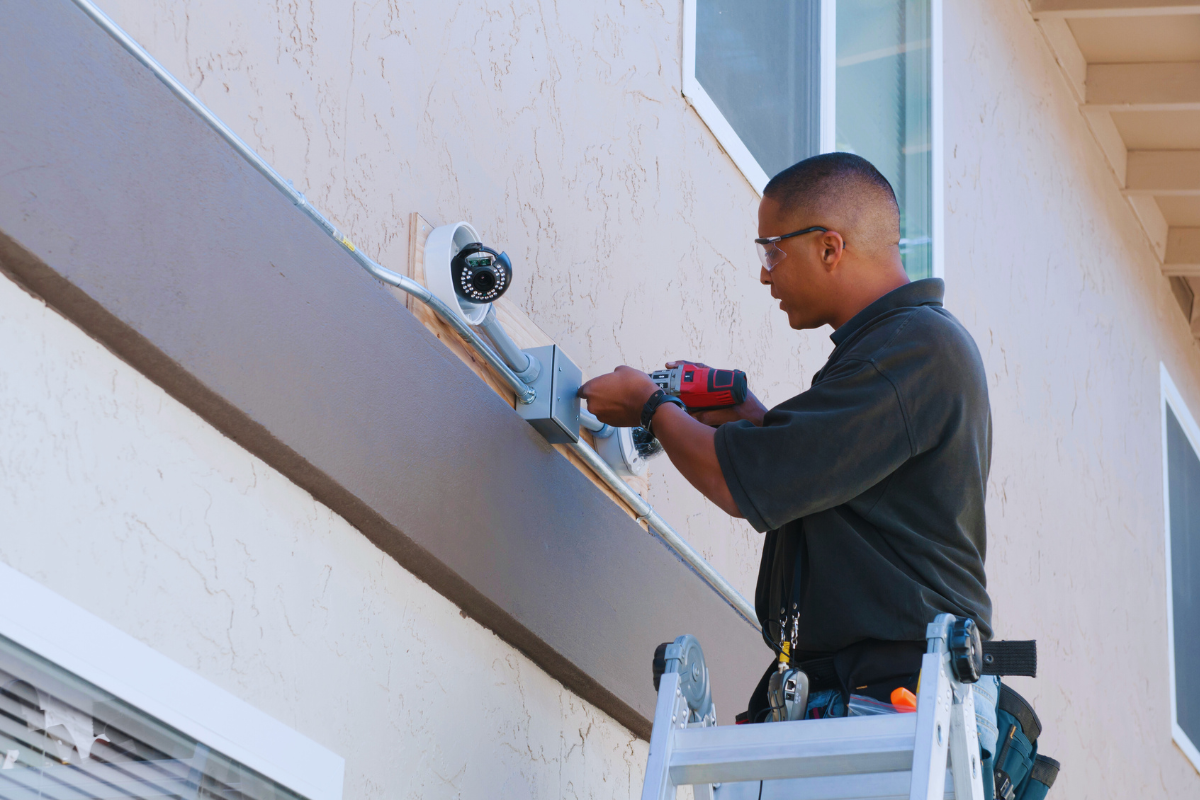
How to Install Security Cameras Professionally
1. Mount the Bracket Securely
Use anchors or screws based on the surface (brick, drywall, wood). Always level the bracket before tightening.
2. Run Cabling with Care
Keep cable paths clean and protected using conduit, raceways, or cable trays. Use PoE where possible to simplify power and data delivery.
3. Connect to the NVR or Cloud System
Once cameras are mounted and wired, connect them to the network recorder or cloud-based system. Assign IP addresses and update firmware as needed.
4. Adjust Angles and Focus
Use the live feed to fine-tune the camera's field of view. Avoid cutting off critical areas (doors, license plates, facial zones).
5. Label and Document Everything
Label each camera port and save your wiring map. This will save time during maintenance or troubleshooting.
Professional installation demands precision, documentation, and foresight. Be methodical at each step and your clients will notice the difference in uptime, image quality, and service efficiency.
Common Pitfalls to Avoid
Even seasoned pros can make mistakes. Watch out for:
-
Using indoor-rated cameras outside
-
Forgetting surge protection on long cable runs
-
Overloading PoE switches without checking wattage
-
Skipping firmware updates or password changes
-
Improperly grounding outdoor cameras
Referencing a CCTV installation guide can help avoid these issues and ensure long-term system reliability.
You’re not just installing cameras—you’re designing systems that help businesses operate safely and legally. Don’t cut corners, even when clients are watching the clock.

Choosing the Right Camera System
Not all CCTV solutions are equal. Factors to consider:
-
Resolution: Minimum 1080p for facial recognition or license plate capture
-
Storage capacity: Enough to hold 30+ days of footage if required
-
Motion detection: Smart alerts reduce monitoring workload
-
Weatherproofing: Look for IP66+ ratings for outdoor use
-
Integrations: Compatible with alarms, access control, or mobile apps
Explore professional-grade camera systems
Understanding your client's needs is just as important as the technical specs. Match the features to the purpose. A retail location has different needs than a senior facility or warehouse. A thoughtful approach will keep clients coming back.
Tools and Equipment You’ll Need
For smooth installations, make sure your kit includes:
-
Drill with bits for masonry and wood
-
Fish tape or cable puller
-
Cable tester and crimper
-
Screwdrivers, anchors, and grommets
-
PoE injector/switch
-
Laptop or monitor for on-site testing
-
Label maker and zip ties
A reliable toolkit is essential for quick problem-solving and maintaining a professional workflow. Many pros also bring backup cameras or extra cabling to address surprises in the field.
Troubleshooting Tips
If the feed isn't displaying:
-
Check PoE port power output
-
Test cable continuity
-
Ensure the camera has a unique IP address
-
Reboot NVR and check firmware version
-
Double-check port forwarding for remote access
Most issues come down to power, IP conflicts, or cabling—always test as you go. The more you test during install, the fewer support calls you’ll get later.
You’re the Pro—Install Like One
As a security installer, your work is more than just tech—it’s about trust. Your clients depend on you to protect their people, property, and peace of mind. This CCTV installation guide isn’t just a checklist—it’s your edge.
Whether setting up indoor cameras in a senior care facility or optimizing outdoor security cameras for perimeter coverage, every decision you make impacts system performance. A professional installation means minimal false alarms, clean wiring, complete coverage—and zero guesswork.
By applying these best practices for camera installation, you not only deliver results but build long-term client relationships and a reputation for excellence.
Need equipment built for pros?
Shop commercial-grade CCTV, accessories, and mounting kits at All Security Equipment.