Skip to content
You’ll need to program a garage door keypad after a new install, when you’ve forgotten the old code, or when you want to retire a code you’ve shared too widely. There are really only two ways to do it, and which one you use depends on the keypad: a brand-matched keypad pairs through the Learn button on your opener, while a universal keypad is set up by entering a brand code on the keypad itself. Once you know which type you have, the whole thing takes about two minutes.
Have a LiftMaster opener specifically? Use our LiftMaster keypad programming guide for the exact key sequence. No Learn button on your opener? See how to program a keypad without a Learn button.
Before You Start: Identify Your Keypad and Opener
A minute of checking here saves a lot of trial and error:
-
Is your keypad brand-matched or universal? A brand-matched keypad came with your opener or carries the same brand. A universal keypad (Clicker, Genie, or any box that says it “works with all major brands”) needs a brand code. Brand-matched uses Method 1; universal uses Method 2.
-
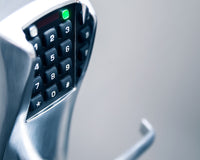
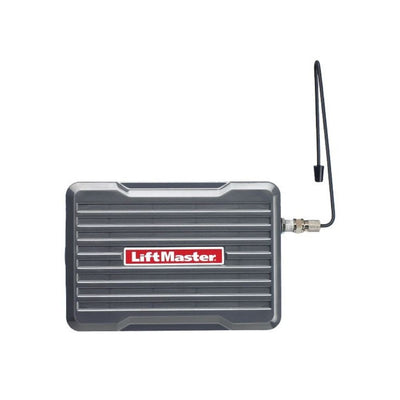
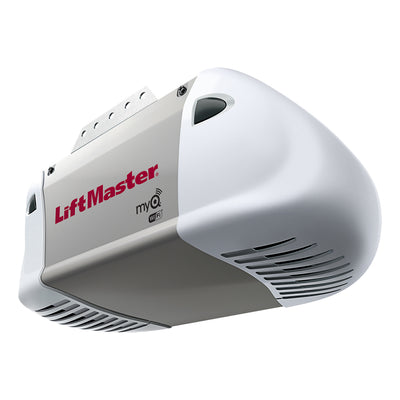
Find the Learn button and note its color. It’s on the motor unit, usually under the light lens or near the hanging antenna wire, and it’s color-coded by model.
-
Check the batteries. Fresh batteries and clean, debris-free contacts. Dead or corroded contacts are the most common reason a keypad won’t program.
Method 1: Program Using the Opener’s Learn Button
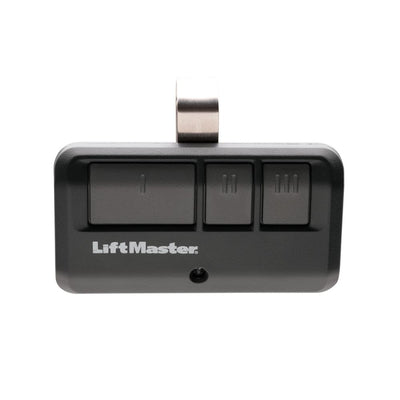
This is the method for brand-matched keypads on standard LiftMaster, Chamberlain, Craftsman, and Genie Intellicode openers:
-
Find the Learn button on the motor unit (under the light lens or near the antenna wire).
-
Press and release it, but don’t hold it. A small LED turns on and gives you about a 30-second window.
-
Go to the keypad and enter your new 4-digit PIN.
-
Press and hold the Enter button until the opener light blinks or you hear a click, then release. That confirms the code is saved.
-
Test it. Enter the PIN on the keypad; the door should open.
Want to wipe the old code first?
Press and hold the Learn button for about 6 seconds until the LED goes out. That clears every stored code and remote, giving you a clean slate. Only do this if you mean to, because it unpairs your remotes too, so you’ll have to add them again.
Method 2: Program a Universal Keypad With a Brand Code
Universal keypads (Clicker, Genie, and other multi-brand models) don’t only use the Learn button. You also tell them which opener brand you have with a code, which is the step most guides leave out:
-
Reset the keypad. Press and hold the **star (*) and pound (#)** keys at the same time until the keypad’s light stops blinking.
-
Enter your new 4-digit PIN, then press #.
-
Enter your opener’s brand ID number, then press #. The brand number comes from the keypad’s manual or the manufacturer chart printed with it.
-
Sync with the opener. Press and release the Learn button on the motor unit, return to the keypad, type your PIN, and press 0.
-
Test it. The door should respond.
About the brand code: every universal keypad ships with a chart that matches a number to your opener brand: LiftMaster/Chamberlain, Genie, Linear, Overhead Door, Craftsman, Marantec, and so on. Use that chart, because the exact digits differ from one keypad model to the next.
How to Reprogram or Change the Code on an Existing Keypad
Reprogramming isn’t a separate process. It’s the same steps with a new PIN, and the new code overwrites the old one:
-
To reprogram from scratch, re-run Method 1 or Method 2 with your new PIN.
-
To change only the code when you know the current one, many keypads let you do it directly: enter the current PIN, press and hold #, then enter the new PIN. Confirm with Enter (or 0 on keypads without an Enter key).
If you have a LiftMaster opener and want the full set of change-code options, including temporary PINs for guests, the myQ app, and Chamberlain compatibility, see How to Change Your LiftMaster Garage Code.
Garage Door Keypad Not Programming? Fixes
If the code won’t take, work through these before assuming the keypad is broken:
-
Batteries. Right type, correct orientation, clean contacts.
-
The 30-second window. Move quickly between pressing the Learn button and entering the PIN; reset and retry if you were slow.
-
Wrong brand code (universal keypads). Re-enter the brand ID from the chart for your exact opener.
-
The Learn button wasn’t really pressed. On some models the button is recessed or under the lens, so make sure the LED actually lit.
-
No Enter button on the keypad. Use the # or 0 key to confirm instead.
-
Smart keypads. MyQ and Security+ 3.0 keypads only program in the app, not with the Learn button.
If the keypad has no backlight and won’t respond at all, it’s likely a hardware fault. See how to troubleshoot a keypad that isn’t working, or move on to our garage door keypad replacement guide.
Garage Door Keypad Security Tips
A new code is only as good as how you protect it:
-
Skip the obvious codes. No 1234, 0000, 1111, your address, or your birthday, because those get guessed first.
-
Change the code now and then. A yearly swap is enough to keep old shared codes from being a problem.
-
Use a separate temporary code for visitors. Cleaners, dog walkers, and contractors should get a temporary PIN, not your main one.
-
Guard the remote. Anyone with your remote can open the door even without the code, so don’t leave it visible in a parked car.
Need a New Keypad?
If your keypad is worn out or you’re setting up keyless entry for the first time, we stock keypads for every major opener at All Security Equipment:
-
LiftMaster 878MAX: a reliable standard keypad that works with both LiftMaster and Chamberlain openers.
-
LiftMaster KPW5: heavier-duty build for commercial or high-traffic doors.
-
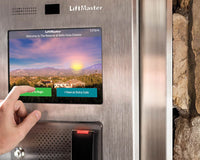
LiftMaster myQ Video Keypad (VKP1-LM): adds app control, access logs, and a camera.
Browse the full keypad collection to match a keypad to your opener, or contact our team if you want a recommendation.
Frequently Asked Questions
Q1. How do I program my garage door opener keypad?
For a brand-matched keypad, press and release the Learn button on the motor unit, then enter your 4-digit PIN on the keypad and hold Enter until the opener light blinks. For a universal keypad, reset it by holding * and #, enter your PIN and press #, enter your opener’s brand code and press #, then press the Learn button and confirm at the keypad.
Q2. How do I reprogram a garage door keypad?
Reprogramming uses the same steps as programming, just with a new PIN. The new code overwrites the old one. Re-run the Learn-button method or the universal brand-code method depending on your keypad type.
Q3. How do I change the 4-digit code on my garage door keypad?
If you know the current code, many keypads let you change it directly: enter the current PIN, press and hold #, then enter the new PIN and confirm. If you don’t know the current code, reprogram the keypad from scratch using the Learn button or the universal brand-code method.
Q4. How do I program a universal or Clicker garage keypad?
Reset the keypad by holding the star and pound keys until the light stops blinking. Enter your 4-digit PIN and press #, enter the brand ID number for your opener (from the keypad’s chart) and press #, then press the Learn button on the opener, return to the keypad, type the PIN, and press 0.
Q5. How do I program a Chamberlain garage door keypad?
Chamberlain and LiftMaster share the same parent company and use the same Learn-button logic. Press and release the Learn button on the motor unit, enter your 4-digit PIN on the keypad, and hold Enter until the opener light blinks. The button color and location vary slightly by model.
Q6. My keypad has no Enter button, so how do I confirm the code?
Use the # or 0 key (some models use an arrow) instead of Enter. The 4-digit sequence is the same; only the confirm key changes. Check your model number or test each candidate key with a known code.