Skip to content
Mastering Loop Detector Installation
Inductive loop detectors are essential components in various security and traffic management systems. At their core, they function by detecting changes in a magnetic field. An insulated wire loop, or coil, is buried beneath a driveway and connected to a loop detector unit. This unit sends an electrical current through the wire loop, creating a magnetic field. When a metallic object, such as a vehicle or a person carrying metal, passes over the loop, it disrupts this magnetic field, triggering an output signal, which can then be used to activate gates, barriers or alarm systems.
The reliability of Loop Detectors to function in various weather conditions make them a cornerstone of access control and security.

A properly installed loop detector is paramount for the effective operation of your security or traffic management system. Incorrect installation can lead to a multitude of problems, compromising the safety of your property.
For instance, if the loop is not buried at the correct depth or if the wiring connections are faulty, the detector might fail to register the presence of a vehicle, leaving your property vulnerable to unauthorized access. Conversely, improper installation can also result in false triggers, causing unnecessary disruptions, such as gates opening randomly or alarms sounding without reason.
These malfunctions can be frustrating, reduce the lifespan of your equipment, and, more importantly, create security vulnerabilities.

Ensuring a seamless and reliable security system starts with the correct installation of your loop detectors. Which is why All Security Equipment’s blog post is designed to be a comprehensive guide into the installation process. Whether you are a seasoned security professional, a diligent property manager, or a homeowner looking to enhance your security, today you will learn the essential do’s and don’ts of loop detector installation.
Loop Detectors: Three Most Common Varieties

Before diving into the intricacies of installing loop detectors and common pitfalls to avoid, it’s crucial to understand the three primary categories these essential security devices come in. Each type offers distinct advantages and considerations for installation, making the selection process dependent on the specific application and site conditions to ensure a suitable choice.
-
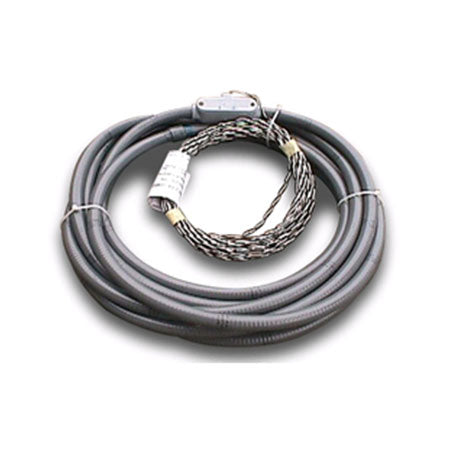
Prefabricated Loops: These are pre-manufactured loops, delivered ready for installation in standard sizes and configurations. They offer convenience and consistency, often saving time and ensuring reliable performance. Using the right loop sealant is essential to ensure a secure installation. There are two main subtypes:
-
Direct Burial Loops: Designed to be buried directly under the surface, either on top of rebar before pouring concrete or within excavated areas under gravel or asphalt. It is crucial to fill the sawcut slots properly to prevent water ingress, which can affect the loop's performance.
-
Saw-Cut Loops: Intended for installation in narrow slits cut into existing driveways or surfaces using a saw-cutting tool.
-
-
Wireless Gate Loops: These offer a cable-free alternative for vehicle detection, utilizing wireless technology to transmit signals between a loop “puck” (transmitter) and a receiver connected to the gate operator. They provide flexibility for retrofitting or installations where physical wiring is challenging.
-
Loop Wire: This method involves manually assembling the loop on-site using durable Cross-Linked Polyethylene (XLPE) wire. The wire is carefully placed within saw-cut slits in the pavement, requiring precise installation to avoid damage and ensure long-lasting functionality.
Installation: Do's and Don'ts for Each Type

Prefabricated Loops: Streamlined Installation
-
DO: Carefully plan loop placement based on gate type and access needs, typically allowing for a loop width 4ft narrower than the driveway and a depth of 3-4ft. For multiple loops, maintain at least 4ft of spacing to prevent interference.
-
DO: For direct burial, secure the prefabricated loop to the rebar with loop ties before pouring concrete. Ensure the lead wire is run through a protective conduit to the gate opener.
-
DO: For gravel or asphalt, excavate the loop area, lay the loop, cover it with a layer of sand to protect it, and then backfill and compact the area.
-
DO: When using saw-cut prefabricated loops, precisely follow the manufacturer’s instructions for cutting depth and inserting the loop into the slits.
-
DO: Understand that a moving vehicle affects the loop's electromagnetic qualities, which is crucial for accurate vehicle detection.
-
DO: Be aware of the opposite effect of different materials on the loop's inductance, as ferromagnetic materials can enhance inductance while peripheral metals generate eddy currents that reduce it.
-
DON’T: Create sharp bends or overlaps in the loop wire during installation, as this can negatively impact detection performance.
-
DON’T: Forget to install a conduit to protect the lead wire running from the loop to the detector unit.
-
DON’T: Overlook the net effect of improper installation, which can lead to decreased inductance and poor loop performance.
Loop Wire (XLPE): The DIY Approach
-
DO: Accurately mark the loop layout on the driveway using a chalk line before cutting.
-
DO: Cut the driveway slits approximately 1.5” deep and wide enough to accommodate the wire, with slightly wider sections for the lead wire.
-
DO: Starting at the gate opener with extra slack, carefully run the XLPE wire within the saw-cut slits, looping around 2-4 times depending on the loop size (smaller loops require more turns). The number of turns in the loop wire affects the total inductance, which is crucial for the system's sensitivity.
-
DO: Run the two ends of the loop wire back to the gate opener, tightly twist them together to form the lead wire, and run this lead wire through a protective conduit. The system sends a pulse to the controller when a vehicle is detected by a decrease in the inductance of the loop.
-
DON’T: Make sharp bends or kinks in the XLPE wire during the looping process, as this can cause signal issues.
-
DON’T: Neglect to twist the loop wire ends properly to create a reliable lead wire connection.
-
DON’T: Skip the installation of a conduit to shield the lead wire from potential damage. Peripheral metal of vehicles can affect the loop's inductance, leading to inaccurate vehicle detection.
Wireless Gate Loops & Exit Probes: Simplified Setup
-
DO: Carefully select the mounting location for the wireless transmitter (puck) based on the manufacturer’s recommendations (center, side, above, or below the driveway).
-
DO: Ensure a clear wireless signal path between the transmitter and the receiver unit connected to the gate operator.
-
DO: For exit probes, position them according to the desired detection range (typically 5-7.5ft radius from a side installation).
-
DO: Securely run the lead wire from the exit probe to the gate opener or detector unit, protecting it from damage.
-
DO: Utilize sensors in wireless gate loops to enhance vehicle detection and ensure efficient operation.
-
DO: Recognize the importance of vehicle detection loops in traffic management for accurate vehicle identification and minimizing false positives.
-
DON’T: Install wireless components in areas with significant electromagnetic interference that could disrupt the signal.
-
DON’T: Exceed the specified detection range of exit probes, as this can lead to unreliable triggering.
-
DON’T: Leave the lead wire of exit probes exposed to potential damage from vehicles or environmental factors.
-
DON’T: Neglect proper support for the lead wire, as improper configuration can affect system performance and sensitivity.
Looping It All Together: Security Starts with Smart Installation

In conclusion, the correct installation of loop detectors is not merely a technicality but a fundamental aspect of ensuring the reliable and secure operation of your access control or traffic management system. As we’ve explored today, from understanding the basic functionality and the critical importance of proper setup to navigating the specific do’s and don’ts, each step plays a vital role in preventing malfunctions and enhancing security.
For those seeking top-tier performance and reliability, we highly recommend considering products such as the National Loop 4’ X 10’ Preformed Saw Cut Loops for their consistent quality and ease of integration into saw-cut applications. For detector units, the user-friendly and dependable LiftMaster LM Plug In Loop Detector offers seamless connectivity and reliable detection. Additionally, the EMX Multi-Voltage Loop Detector stands out for its versatility and robust performance across various voltage requirements.
These products represent a blend of quality engineering and proven effectiveness in the field.
Ready to elevate your security system with expertly installed loop detectors and top-of-the-line products? For further information, detailed specifications, or to inquire about purchasing any of the recommended loop detectors, do not hesitate to reach out to the knowledgeable customer service team at All Security Equipment today!