 Skip to content

LiftMaster Plus Series Garage Door Opener Instruction Manual (6580L)
Documentation Information
- Manufacturer
- LiftMaster (The Chamberlain Group LLC)
- Series and model
- Plus Series: 6580L
- Equipment type
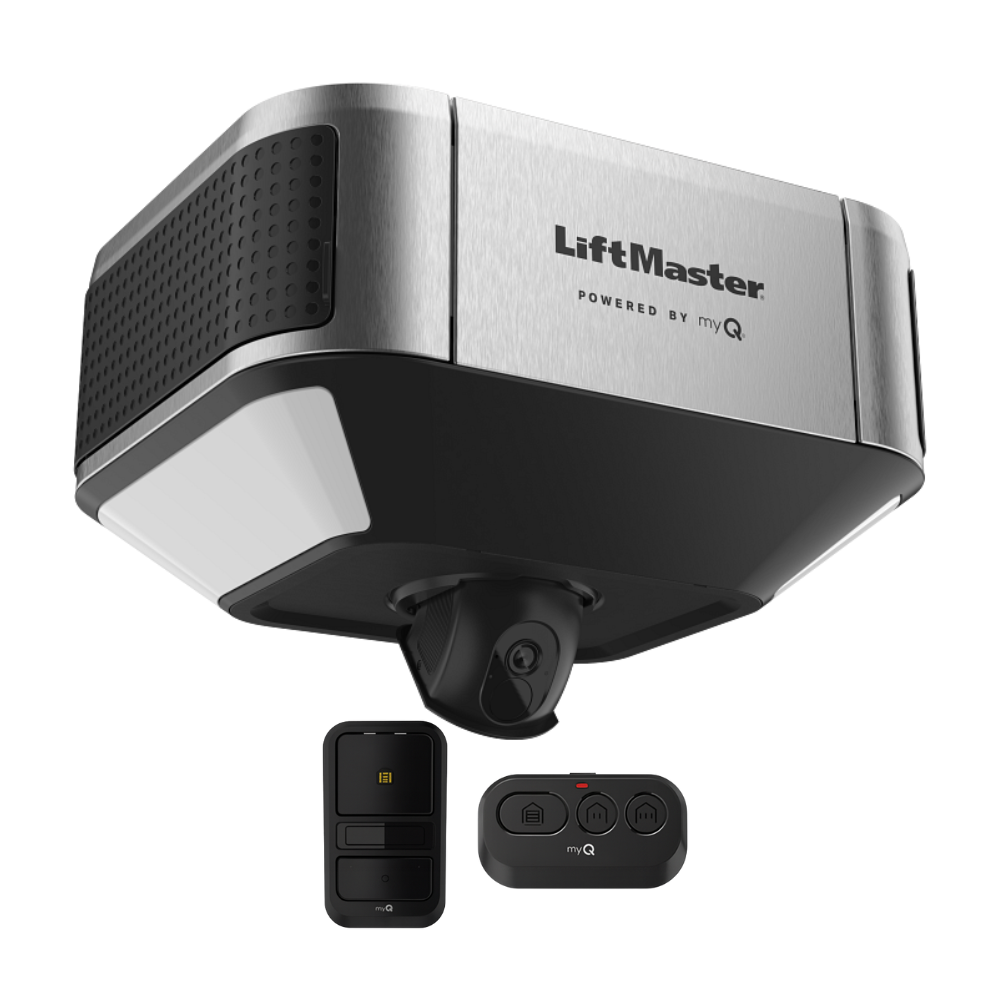
- Residential smart LED belt drive garage door opener with myQ Wi-Fi, camera, and battery backup (residential use only)
- Document type
- Installation Manual (English pages 1 to 49; this page uses only the content that applies to the 6580L)
- Manufacturer document number
- 114-6151-000
- Manual revision
- Not printed on the English pages of the manual
- Manual copyright / publication
- ©2025 The Chamberlain Group LLC. The manual does not print a revision date.
- Source
- LiftMaster Installation Manual 114-6151-000; see Original LiftMaster Documentation
- HTML resource last updated
- November 19, 2026
Common tasks: Install the opener | Connect to Wi-Fi and myQ | Program a remote | Set the open and close positions | Diagnostic codes | Repair parts
LiftMaster 6580L Plus Series Garage Door Opener Overview
The LiftMaster 6580L is the Plus Series garage door opener. LiftMaster sells its residential openers in three series (Basic, Plus, and Premium), and the Plus Series has this one model. LiftMaster's Installation Manual (document 114-6151-000, titled "Smart LED Garage Door Openers" and marked "for residential use only") also covers other models that are not part of the Plus Series; this page covers only the 6580L, and uses only the parts of the manual that apply to it.
LiftMaster's manual says the opener is compatible only with myQ and Security+ 3.0 accessories, that periodic checks of the opener are required to ensure safe operation, and that the door will not close unless the Protector System (safety reversing sensors) is connected and aligned.
About the 6580L
Per our LiftMaster 6580L product page, the 6580L is a 1 HP DC belt drive opener with battery backup, dual LED lighting, an adjustable video camera, and myQ connectivity. The product page lists these items as included: a three-button transmitter (L993M), a motion-detection control panel (L957W), and the battery backup (485LM). The manual's carton inventory and repair parts pages show the same control panel, remote control, and battery model numbers.
All Security Equipment note. The manual does not state horsepower or list what ships in the carton by quantity; those details, the price, and the warranty summary come from the 6580L product page. See the product page for current details.
Carton Inventory for the 6580L
LiftMaster's carton inventory (page 8) lists these items. LiftMaster notes that accessories vary by the garage door opener model purchased, that the instructions for other accessories are attached to the accessory and are not in the manual, and that the images in the manual are for reference and your product may look different.
- Header bracket
- Pulley and bracket
- Door bracket
- Curved door arm and straight door arm
- Trolley
- Emergency release rope and handle
- Rail
- Garage door opener
- Belt cap retainer and belt
- Control panel, Model L957W, with white and red/white wire
- The Protector System (safety reversing sensors with 2 conductor white and white/black wire attached): sending sensor (1), receiving sensor (1), and safety sensor brackets (2)
- Safety labels and literature
- Rail grease
- Remote control(s)
- Battery
Swipe sideways to see all columns.
| Hardware group | Items |
|---|---|
| Installation hardware | Hex bolt 5/16"-18 x 7/8" (4); lock washer 5/16" (4); nut 5/16"-18 (4); lag screw 5/16"-9 x 1-5/8" (2); self-threading screw 1/4"-14 x 5/8" (2); clevis pin 5/16" x 2-3/4" (1); clevis pin 5/16" x 1-1/4" (1); clevis pin 5/16" x 1" (1); ring fastener (3); hex screw 10-24 (2); wing nut (2) |
| Rail hardware | Washered bolt 5/16"-18 x 1/2" (2) (mounted in the top of the garage door opener) |
| Control panel hardware | Screw 6AB x 1-1/4" (2); drywall anchors (2) |
LiftMaster's tools-needed page (page 5) is illustrated and lists the tools in pictures; see the original page for it.
Source: LiftMaster Installation Manual 114-6151-000, cover, pages 1 to 8.
Important Safety Information
Safety Symbols and Unattended Operation
The manual says the opener was designed and tested to offer safe service provided it is installed, operated, maintained, and tested in strict accordance with its instructions and warnings. Its safety symbols mark mechanical and electrical hazards (which alert you to the possibility of serious injury or death), and the CAUTION signal word alerts you to possible damage to the garage door or opener. It includes a California Proposition 65 warning (this product can expose you to chemicals including lead; www.P65Warnings.ca.gov). The images in the manual are for reference only and your product may look different.
Unattended operation (LiftMaster, page 3): the Timer-to-Close (TTC) feature and the myQ app are examples of unattended close and are to be used ONLY with sectional doors. Any device or feature that allows the door to close without being in the line of sight of the door is considered unattended close. DO NOT install on a one-piece door if using devices or features providing unattended close.
Check the Door Before You Begin (Page 4)
To prevent possible SERIOUS INJURY or DEATH: ALWAYS call a trained door systems technician if the garage door binds, sticks, or is out of balance (an unbalanced door may NOT reverse when required). NEVER try to loosen, move or adjust the garage door, door springs, cables, pulleys, brackets or their hardware, ALL of which are under EXTREME tension. Disable ALL locks and remove ALL ropes connected to the garage door BEFORE installation to avoid entanglement. DO NOT install on a one-piece door if using devices or features providing unattended close. To prevent damage to the door and opener: ALWAYS disable locks BEFORE installing and operating the opener, and ONLY operate the opener at 120V, 60 Hz to avoid malfunction and damage.
Before you begin
- Disable locks and remove any ropes connected to the garage door.
- Lift the door halfway up. Release the door. If balanced, it should stay in place, supported entirely by its springs.
- Raise and lower the door to check for binding or sticking. If your door binds, sticks, or is out of balance, call a trained door systems technician.
- Check the seal on the bottom of the door. Any gap between the floor and the bottom of the door must not exceed 1/4" (6 mm); otherwise the safety reversal system may not work properly.
- The opener should be installed above the center of the door. If there is a torsion spring or center bearing plate in the way of the header bracket, it may be installed within 4 feet (1.2 m) to the left or right of the door center.
Source: LiftMaster Installation Manual 114-6151-000, pages 3 and 4.
Important Safety Instructions for Installation (Page 11)
To reduce the risk of SEVERE INJURY or DEATH:
- READ AND FOLLOW ALL INSTALLATION WARNINGS AND INSTRUCTIONS.
- Install the garage door opener ONLY on a properly balanced and lubricated garage door. An improperly balanced door may NOT reverse when required and could result in SEVERE INJURY or DEATH.
- ALL repairs to cables, spring assemblies and other hardware MUST be made by a trained door systems technician BEFORE installing the opener.
- Disable ALL locks and remove ALL ropes connected to the garage door BEFORE installing the opener to avoid entanglement.
- Where possible, install the door opener 7 feet (2.13 m) or more above the floor.
- Mount the emergency release within reach, but at least 6 feet (1.83 m) above the floor and avoiding contact with vehicles to avoid accidental release.
- NEVER connect the garage door opener to a power source until instructed to do so.
- NEVER wear watches, rings or loose clothing while installing or servicing the opener.
- Install the wall-mounted garage door control within sight of the garage door, out of reach of small children at a minimum height of 5 feet (1.5 m) above floors, landings, steps or any other adjacent walking surface, and away from ALL moving parts of the door.
- Place the entrapment warning label on the wall next to the garage door control in a prominent location.
- Place the emergency release/safety reverse test label in plain view on the inside of the garage door.
- Upon completion of installation, test the safety reversal system. The door MUST reverse on contact with a 1-1/2" (3.8 cm) high object (or a 2x4 laid flat) on the floor.
- DO NOT install on a one-piece door if using devices or features providing unattended close.
- SAVE THESE INSTRUCTIONS.
Source: LiftMaster Installation Manual 114-6151-000, page 11.
Important Safety Instructions for Operation (Page 30)
To reduce the risk of SEVERE INJURY or DEATH:
- READ AND FOLLOW ALL INSTALLATION WARNINGS AND INSTRUCTIONS.
- ALWAYS keep remote controls out of reach of children. NEVER permit children to operate or play with garage control panel push buttons or remote controls.
- ONLY activate the garage door when it can be seen clearly, it is properly adjusted, and there are no obstructions to door travel.
- ALWAYS keep the garage door in sight and away from people and objects until completely closed. NO ONE SHOULD CROSS THE PATH OF THE MOVING DOOR.
- NO ONE SHOULD GO UNDER A STOPPED, PARTIALLY OPENED DOOR.
- If possible, use the emergency release handle to disengage the trolley ONLY when the garage door is CLOSED. Use caution when using this release with the door open. Weak or broken springs or an unbalanced door could result in an open door falling rapidly and/or unexpectedly and increasing the risk of SEVERE INJURY or DEATH.
- NEVER use the emergency release handle unless the garage doorway is clear of persons and obstructions.
- NEVER use the handle to pull the garage door open or closed. If the rope knot becomes untied, you could fall.
- After ANY adjustments are made, the safety reversal system MUST be tested.
- The safety reversal system MUST be tested every month. The door MUST reverse on contact with a 1-1/2" (3.8 cm) high object (or a 2x4 laid flat) on the floor. Failure to adjust the opener properly increases the risk of SEVERE INJURY or DEATH.
- ALWAYS KEEP THE GARAGE DOOR PROPERLY BALANCED. An improperly balanced door may NOT reverse when required and could result in SEVERE INJURY or DEATH.
- ALL repairs to cables, spring assemblies and other hardware, ALL of which are under EXTREME tension, MUST be made by a trained door systems technician.
- To avoid interference with the proper operation of the opener when using a welder in the garage, unplug the opener before operating the welder.
- This operator system is equipped with an unattended operation feature. The door could move unexpectedly. NO ONE SHOULD CROSS THE PATH OF THE MOVING DOOR.
- DO NOT install on a one-piece door if using devices or features providing unattended close.
- SAVE THESE INSTRUCTIONS.
Source: LiftMaster Installation Manual 114-6151-000, page 30.
Wi-Fi and myQ App Connection
LiftMaster recommends confirming your Wi-Fi signal in the garage before installing the opener (page 4), and connecting with the myQ app (page 32). myQ app control will NOT work if the opener is operating on battery power.
What You Will Need
- A Wi-Fi enabled smartphone, tablet, or laptop.
- A broadband internet connection.
- A Wi-Fi signal in the garage (2.4 GHz, 802.11b/g/n required).
- The password for your home network (the router's main account, not the guest network).
- The myQ serial number located on the garage door opener (the manual has a place to write down the myQ serial number, product serial number, and date of purchase, page 3).
Test the Wi-Fi Signal Strength (Page 4)
Make sure your mobile device is connected to your Wi-Fi network. Hold your mobile device in the place where the opener will be installed and check the Wi-Fi signal strength. If the signal is strong, the opener will connect to your Wi-Fi network. If the signal is weak, the opener may connect; if not, try one of the options below. If there is no Wi-Fi signal, the opener will not be able to connect: move your router closer to the opener to minimize interference from walls and other objects, or buy a Wi-Fi range extender. For compatible router specifications and help, LiftMaster directs you to support.chamberlaingroup.com.
Download the App and Connect (Page 32)
Open and close your door, get alerts, and set schedules from anywhere. Connected smart openers also receive software updates. The garage door opener must run through a complete cycle before it will activate Wi-Fi programming.
- Download the myQ app (the manual's cover has a QR code for the free app).
- Set up an account and connect.
If you already have the myQ app installed: check that your mobile device has the latest software, and download the latest version of the myQ app.
Wi-Fi Status LED
An LED on the garage door opener indicates Wi-Fi status.
Swipe sideways to see all columns.
| LED | Definition |
|---|---|
| Blue, off | Wi-Fi is not turned on. |
| Blue, blinking | Garage door opener is in Wi-Fi learn mode. |
| Blue, solid | Mobile device connected to the garage door opener. |
| Blue and green, blinking | Attempting to connect to router. |
| Green, blinking | Attempting to connect to the internet server. |
| Green, solid | Wi-Fi has been set up and the garage door opener is connected to the internet. |
To erase the Wi-Fi settings, see Erase the Memory.
Source: LiftMaster Installation Manual 114-6151-000, pages 3, 4 and 32.
LiftMaster 6580L Installation
LiftMaster's installation sequence is: assembly of the belt rail, header bracket, rail, opener hanging, emergency release, door bracket and door arm, then the control panel, the Protector System, power, and adjustments. The steps below follow the manual's pages 9 to 25. LiftMaster notes that your installation may differ from its illustrations.
Assembly: Attach the Belt Rail to the Opener (Page 9)
To avoid possible SERIOUS INJURY to fingers from the moving opener: ALWAYS keep hands clear of the sprocket while operating the opener. To avoid SERIOUS damage to the opener, use ONLY the bolts/fasteners mounted in the top of the opener.
Step 1, attach the belt rail
Use only the bolts removed from the opener, and place the opener on the packing material to prevent scratching.
- Remove the two bolts from the top of the garage door opener.
- Cut away and discard the tape and Styrofoam from around the rail, then align the holes in the rail with the holes in the opener.
- Fasten the rail with the previously mentioned bolts.
- Position the belt around the opener sprocket.
- Position the belt cap retainer over the opener sprocket and attach with hex screws.
Step 2, tighten the belt
- By hand, thread the spring trolley nut on the threaded shaft until it is finger tight against the trolley. Do not use any tools.
- Insert a flathead screwdriver tip into one of the nut ring slots and brace it firmly against the trolley.
- Tighten the spring trolley nut with an adjustable wrench or a 7/16" open end wrench about a quarter turn until the spring releases and snaps the nut ring against the trolley. This sets the spring to optimum belt tension.
Source: LiftMaster Installation Manual 114-6151-000, page 9.
Determine the Header Bracket Location (Page 12)
To prevent possible SERIOUS INJURY or DEATH: the header bracket MUST be RIGIDLY fastened to structural support on the header wall or ceiling, otherwise the garage door might NOT reverse when required. DO NOT install the header bracket over drywall. Concrete anchors MUST be used if mounting the header bracket or 2x4 into masonry. NEVER try to loosen, move or adjust the garage door, springs, cables, pulleys, brackets, or their hardware. ALWAYS call a trained door systems technician if the door binds, sticks, or is out of balance.
Close the door and mark the inside vertical centerline of the garage door. Extend the line onto the header wall above the door. You can fasten the header bracket within 4 feet (1.22 m) to the left or right of the door center only if a torsion spring or center bearing plate is in the way, or you can attach it to the ceiling when clearance is minimal. (It may be mounted on the wall upside down if necessary to gain approximately 1/2" (1 cm).) If you need to install the header bracket on a 2x4 (on wall or ceiling), use lag screws (not provided) to securely fasten the 2x4 to structural supports.
Open your door to the highest point of travel. Draw an intersecting horizontal line on the header wall 2" (5 cm) above the high point; this height provides travel clearance for the top edge of the door. If the total number of inches exceeds the height available in your garage, use the maximum height possible, or refer to page 13 for ceiling installation.
Source: LiftMaster Installation Manual 114-6151-000, page 12.
Install the Header Bracket (Page 13)
You can attach the header bracket either to the wall above the garage door or to the ceiling. Do not install the header bracket over drywall. If installing into masonry, use concrete anchors (not provided).
Option A, wall installation
- Center the bracket on the vertical centerline with the bottom edge of the bracket on the horizontal line (with the arrow pointing toward the ceiling).
- Mark the vertical set of bracket holes (do not use the holes designated for ceiling mount). Drill 3/16" pilot holes and fasten the bracket securely to a structural support with lag screws (5/16"-9 x 1-5/8").
Option B, ceiling installation
- Extend the vertical centerline onto the ceiling.
- Center the bracket on the vertical mark, no more than 6" (15 cm) from the wall, with the arrow pointing toward the wall. The bracket can be mounted flush against the ceiling when clearance is minimal.
- Mark the side holes. Drill 3/16" pilot holes and fasten the bracket securely to a structural support with the hardware provided.
Source: LiftMaster Installation Manual 114-6151-000, page 13.
Attach the Rail and Position the Opener (Page 14)
Step 3, attach the rail to the header bracket
- Align the rail with the header bracket. Insert the clevis pin (5/16" x 2-3/4") through the holes in the header bracket and rail. Secure with the ring fastener.
Use the packing material as a protective base for the opener.
Step 4, position the garage door opener
To prevent damage to the garage door, rest the opener rail on a 2x4 placed on the top section of the door.
- Remove the packing material and lift the opener onto a ladder.
- Fully open the door and place a 2x4 (laid flat) under the rail.
A 2x4 is ideal for setting the distance between the rail and the door. If the ladder is not tall enough you will need help at this point. If the door hits the trolley when it is raised, pull the trolley release arm down to disconnect the inner and outer trolley and slide the outer trolley toward the opener. The trolley can remain disconnected until instructed.
Source: LiftMaster Installation Manual 114-6151-000, page 14.
Hang the Garage Door Opener (Page 15)
To avoid possible SERIOUS INJURY from a falling garage door opener, fasten it SECURELY to structural supports of the garage. Concrete anchors MUST be used if installing ANY brackets into masonry.
Hanging your opener will vary depending on your garage; two representative installations are shown. Hanging brackets should be angled to provide rigid support. On finished ceilings, attach a sturdy metal bracket to structural supports before installing the opener (this bracket and its fastening hardware are not provided).
Step 5, hang the opener
- Check to make sure the rail is centered over the door (or in line with the header bracket if the bracket is not centered above the door).
- Measure the distance from each side of the motor unit to the structural support.
- Cut both pieces of the hanging bracket to the required lengths.
- Drill 3/16" pilot holes in the structural supports.
- Attach one end of each bracket to a support with 5/16"-18 x 1-7/8" lag screws (not provided).
- Fasten the opener to the hanging brackets with 5/16"-18 x 7/8" hex bolts, lock washers and nuts.
- Remove the 2x4. Operate the door manually. If the door hits the rail, raise the header bracket.
Note: DO NOT connect power to the opener at this time.
Source: LiftMaster Installation Manual 114-6151-000, page 15.
Attach the Emergency Release Rope and Handle (Page 16)
To prevent possible SERIOUS INJURY or DEATH from a falling garage door: if possible, use the emergency release handle to disengage the trolley ONLY when the garage door is CLOSED. Weak or broken springs or an unbalanced door could result in an open door falling rapidly and/or unexpectedly. NEVER use the emergency release handle unless the garage doorway is clear of persons and obstructions. NEVER use the handle to pull the door open or closed.
Step 6, attach the emergency release rope and handle
- Insert one end of the emergency release rope through the handle. Make sure that "NOTICE" is right side up. Secure with an overhand knot at least 1" (2.5 cm) from the end of the rope to prevent slipping.
- Close the door manually to access the trolley and continue to the next step.
- Insert the other end of the emergency release rope through the hole in the trolley release arm. Mount the emergency release within reach, but at least 6 feet (1.83 m) above the floor, avoiding contact with vehicles to prevent accidental release, and secure with an overhand knot.
Note: if it is necessary to cut the emergency release rope, seal the cut end with a match or lighter to prevent unraveling. Ensure the rope and handle are above the top of all vehicles to avoid entanglement.
Source: LiftMaster Installation Manual 114-6151-000, page 16.
Install the Door Bracket (Pages 16 and 17)
Fiberglass, aluminum, or lightweight steel garage doors WILL REQUIRE reinforcement BEFORE installation of the door bracket. Contact the garage door manufacturer or installing dealer for opener reinforcement instructions or a reinforcement kit. A horizontal and vertical reinforcement is needed for lightweight garage doors (fiberglass, aluminum, steel, doors with glass panel, and so on; not provided). A horizontal brace should be long enough to be secured to two or three vertical supports, and a vertical brace should cover the height of the top panel. Many door reinforcement kits provide for direct attachment of the clevis pin and door arm; in that case you will not need the door bracket and can proceed to the next step.
LiftMaster adds that reinforcing the top section of lightweight sectional doors is critical to the safe and reliable operation of the opener: it strengthens the area where the operator arm connects to the door, and without proper reinforcement the top section may flex, deform, or fail over time, compromising the performance and safety of the whole system.
Step 7, install the door bracket (sectional doors)
- Center the door bracket on the previously marked vertical centerline used for the header bracket installation. Note the correct UP placement, as stamped inside the bracket.
- Position the top edge of the bracket 2"-4" (5-10 cm) below the top edge of the door, OR directly below any structural support across the top of the door.
- Mark, drill holes, and install as follows, depending on your door's construction.
- Metal or lightweight doors using a vertical angle iron brace between the door panel support and the door bracket: drill 3/16" fastening holes and secure the door bracket using the two self-threading screws (1/4"-14 x 5/8"). Alternatively, use two 5/16"-18 x 2" bolts, lock washers and nuts (not provided).
- Metal, insulated, or lightweight factory reinforced doors: drill 3/16" fastening holes and secure the door bracket using the self-threading screws.
- Wood doors: use the top and bottom or side-to-side door bracket holes. Drill 5/16" holes through the door and secure the bracket with 5/16"-18 x 2" carriage bolts, lock washers and nuts (not provided). The 1/4"-14 x 5/8" self-threading screws are not intended for use on wood doors.
Source: LiftMaster Installation Manual 114-6151-000, pages 16 and 17.
Connect the Door Arm to the Trolley (Page 17)
Important: the groove on the straight door arm MUST face away from the curved door arm.
Step 8, connect the door arm to the trolley
- Close the door. Disconnect the trolley by pulling the emergency release handle. Slide the outer trolley back (away from the door) about 2" (5 cm).
- Attach the straight door arm to the outer trolley using the clevis pin. Attach with the ring fastener.
- Attach the curved door arm to the door bracket using the clevis pin. Attach with the ring fastener.
- Align the straight door arm with the curved door arm. Select two aligned holes (as far apart as possible) and attach using the bolts, nuts and lock washers.
- Pull the emergency release handle toward the garage door opener until the trolley release arm is horizontal. The trolley will re-engage automatically when the opener is activated.
Note: when the garage door is in the fully closed position, the curved arm connecting the operator to the door should be positioned so that the lower portion of the arm, extending from the door bracket, is as close to horizontal as possible. This alignment ensures optimal mechanical leverage and smooth operation of the drawbar operator. If the holes do not line up, reverse the straight door arm, then select two aligned holes (as far apart as possible).
Source: LiftMaster Installation Manual 114-6151-000, page 17.
Install the Control Panel (Pages 18 and 19)
To prevent possible SERIOUS INJURY or DEATH from electrocution: be sure power is NOT connected BEFORE installing the control panel, and connect the control panel ONLY to 12 VOLT low voltage wires. To prevent SERIOUS INJURY or DEATH from a closing garage door: install the control panel within sight of the garage door, out of reach of small children at a minimum height of 5 feet (1.5 m) above floors, landings, steps or any other adjacent walking surface, and away from ALL moving parts of the door. NEVER permit children to operate or play with the control panel push buttons or remote controls. Activate the door ONLY when it can be seen clearly, is properly adjusted, and there are no obstructions to door travel. ALWAYS keep the garage door in sight until completely closed.
The opener is compatible with myQ and Security+ 3.0 accessories (see Accessories) and with up to 2 control panels. Older control panels and third party products are not compatible. For gang box installations it is not necessary to drill holes or install the drywall anchors; use the existing holes in the gang box.
Install the control panel
- Strip 7/16" (11 mm) of insulation from one end of the wire and separate the wires. Connect one wire to each of the two screws on the back of the control panel. The wires can be connected to either screw. (For pre-wired installations, choose any two wires to connect and note which wires are used, so the correct wires are connected at the opener in a later step.)
- Mark the location of the bottom mounting hole and drill a 5/32" hole.
- Install the bottom screw, allowing 1/8" (3 mm) to protrude from the wall.
- Position the bottom hole of the control panel over the screw and slide down into place.
- Lift the push bar up and mark the top hole.
- Remove the control panel from the wall and drill a 5/32" hole for the top screw.
- Position the bottom hole of the control panel over the screw and slide down into place. Attach the top screw.
Wire the control panel to the garage door opener
- Run the white and red/white wire from the control panel to the opener. Attach the wire to the wall and ceiling with staples (not applicable for gang box or pre-wired installations). Do not pierce the wire with the staple, as this may cause a short or an open circuit. (For pre-wired installations, use the same wires that are connected to the control panel.)
- Strip 7/16" (11 mm) of insulation from the end of the wire near the opener.
- Connect the wire to the red and white terminals on the opener. To insert or release wires from the terminal, push in the tab with a screwdriver tip.
Attach the warning labels
- Attach the entrapment warning label on the wall near the control panel with tacks or staples.
- Attach the manual release/safety reverse test label in a visible location on the inside of the garage door.
Source: LiftMaster Installation Manual 114-6151-000, pages 18 and 19.
Install the Protector System (Pages 20 to 23)
Be sure power is NOT connected to the garage door opener BEFORE installing the safety reversing sensors. To prevent SERIOUS INJURY or DEATH from a closing garage door: correctly connect and align the safety reversing sensors (this required safety device MUST NOT be disabled), and install the sensors so the beam is NO HIGHER than 6" (15 cm) above the garage floor.
Important: the safety reversing sensors MUST be connected and aligned correctly before the garage door opener will move in the down direction. The Protector System includes two sensors that use a light beam to prevent the door from closing. The sending sensor (amber LED) transmits the beam to the receiving sensor (green LED) when both are powered and aligned. If an obstruction breaks the beam while the door is closing, the receiving sensor (green LED) will flash, then the door will stop and reverse to the full open position. Check that the sensors are installed INSIDE the garage, that the sensor lenses face each other and are aligned horizontally and vertically, that direct sunlight does not hit the receiving sensor, that the receiving sensor has its identifying label, and that the beam is no higher than 6" (15 cm) above the floor and unobstructed.
Step 1, install the safety reversing sensors
The sensors are designed to clip onto the door track with the provided sensor brackets. If the door track will not support the bracket, a wall installation is recommended. Repeat the steps for the other sensor on the opposite side; both lenses must face each other.
- Door track installation: slide the curved arms of the sensor bracket around the edge of the door track and snap into place so the bracket is flush against the track; slide the hex screw through the sensor; and attach the sensor to the bracket with the wing nut, making sure the lens is not obstructed by the bracket.
- Wall installation: make sure the brackets on each side are clear of the door track and have the same amount of clearance (if more is needed, use extension brackets 041A5281-1, not provided, or wood blocks); attach the bracket against the wall with two lag screws (not provided); then slide the hex screw through the sensor and attach with the wing nut.
- Floor installation: measure the position of both brackets so they are the same distance from the wall and unobstructed; attach the bracket to the floor with concrete anchors (not provided); then slide the hex screw through the sensor and attach with the wing nut.
Step 2, wire the safety reversing sensors
Option A, installation without pre-wiring
- Run the wire from both sensors to the opener. Attach with staples, but DO NOT puncture the wire.
- Separate the sensor wires and strip insulation from each end. Twist the two white wires together. Then twist the two white/black wires together.
- Using a screwdriver, push in the terminal tabs, and insert the white wires into the white terminal and the white/black wires into the grey terminal.
Option B, pre-wired installation
- Cut the sensor wires, making sure there is enough wire to reach the pre-installed wires from the wall.
- Separate the sensor wires and strip insulation from each end. Choose two of the pre-installed wires and strip insulation from each end. Choose the same color pre-installed wires for each sensor.
- Connect the pre-installed wires to the sensor wires with wire nuts (not provided), making sure the colors correspond for each sensor.
- At the opener, strip the end of the wires previously connected to the sensors. Twist the like-colored wires together.
- Using a screwdriver, push in the terminal tabs, and insert the wire color connected to the sensor's white wire into the white terminal, and the other wire color (connected to the sensor's white/black wire) into the grey terminal.
Source: LiftMaster Installation Manual 114-6151-000, pages 20 to 23.
Connect Power (Page 24)
To prevent possible SERIOUS INJURY or DEATH from electrocution or fire: be sure power is NOT connected to the opener, and disconnect power to the circuit BEFORE removing the cover to establish a permanent wiring connection. Garage door installation and wiring MUST be in compliance with ALL local electrical and building codes. NEVER use an extension cord or 2-wire adapter, or change the plug in ANY way to make it fit the outlet. Be sure the opener is grounded. To avoid installation difficulties, do not activate the opener at this time.
The opener has a grounding type plug with a third grounding pin. This plug will only fit into a grounding type outlet; if it does not fit, contact a qualified electrician to install the proper outlet.
Option A, typical wiring
- Plug the garage door opener into a grounded outlet.
- DO NOT run the garage door opener at this time.
Option B, permanent wiring (if required by local code)
To make a permanent connection through the 7/8 inch hole in the top of the motor unit (according to local code):
- Be sure power is NOT connected to the opener and disconnect power to the circuit.
- Remove the motor unit cover screws and set the cover aside.
- Cut the power cord 6 inches (15.2 cm) from the top of the opener.
- Remove the strain relief.
- Pull the power cord wires back into the opener.
- Install a conduit or flex cable adapter in the 7/8 inch hole.
- Run the permanent wires through the conduit in the 7/8 inch hole. Strip the insulation from the ends of all wires.
- Connect the black (line) wire to the existing black wire, the white (neutral) wire to the existing white wire, and the ground wire to the existing green ground wire with wire nuts. The opener must be grounded.
- Properly secure the wires with plastic ties so that the wires do not come in contact with moving parts.
Source: LiftMaster Installation Manual 114-6151-000, page 24.
Align the Safety Reversing Sensors and Check the Control Panel (Page 25)
When the opener has power, check the sensors. If they are aligned and wired correctly, both LEDs will glow steadily: the sending sensor has an amber LED, and the receiving sensor has a green LED (marked "Receiver" on the back).
To align the safety reversing sensors
- Loosen the wing nuts.
- Adjust the sensors up or down until both LEDs glow steady, indicating alignment.
- Tighten the wing nut to secure the sensor.
Tip: after tightening the wing nut, lightly wiggle the sensor brackets by hand without blocking the beam to ensure both LEDs remain glowing steady. If the receiving eye flashes while wiggling the brackets, adjust the alignment until a solid LED glow is reached before proceeding.
Safety sensor troubleshooting
- If either sensor LED is off, there is no power to the sensor: check that you have power to the opener; check the sensor wire is not shorted or broken; and check that the sensors are wired correctly (white wires to the white terminal and white/black wires to the gray terminal).
- If the green receiving sensor LED is blinking, the sensors are obstructed or misaligned: check for obstructions in the sensor light beam; align the sensors; and, if the receiving sensor (green LED) faces direct sunlight, switch the receiving sensor with the sending sensor and repeat Step 1, installing the safety reversing sensors.
Ensure the control panel is wired correctly: if the control panel has been installed and wired correctly, the command LED behind the push bar will illuminate or the LCD display will illuminate.
Source: LiftMaster Installation Manual 114-6151-000, page 25.
Adjustments: Program the Travel and Test Safety Reversal
Without a properly installed safety reversal system, persons (particularly small children) could be SERIOUSLY INJURED or KILLED by a closing garage door. Incorrect adjustment of garage door travel limits will interfere with proper operation of the safety reversal system. After ANY adjustments are made, the safety reversal system MUST be tested. The door MUST reverse on contact with a 1-1/2" (3.8 cm) high object (or a 2x4 laid flat) on the floor.
Step 1: Program the Travel (Page 26)
While programming the travel, the UP and DOWN buttons can be used to move the door as needed. During the Automatic Force Setup, the door will automatically open and close.
- Press and hold the Adjustment button until the UP button begins to flash and/or a beep is heard.
- Press and hold the UP button until the door is in the desired UP position.
- Once the door is in the desired UP position, press and release the Adjustment button. The garage door opener lights will flash twice, and the DOWN button will begin to flash.
- Press and hold the DOWN button until the door is in the desired DOWN position.
- Once the door is in the desired DOWN position, press and release the Adjustment button. The garage door opener lights will flash twice. Program the Travel is now complete.
If the garage door opener lights flash 5 times, programming has timed out and the travel limits have not been set. Restart the Program the Travel process.
Step 2: Automatic Force Set Up (Page 26)
The opener enters a force-sensing operation by automatically moving the door open and close. It sounds an audible and visual alert before automatically opening and closing the door, and beeps three times, confirming that the Automatic Force Setup completed successfully. Adjustment is then complete.
- If you hear one long beep after the door attempts to move, the Automatic Force Set Up has not completed successfully. Start over at step 1 of Program the Travel.
- If the travel/force setup process is not completed successfully, any attempt to activate the opener from a remote/keyless entry or wall control will not work, and the opener will flash the work lights 2 times.
Source: LiftMaster Installation Manual 114-6151-000, page 26.
Step 3: Test the Safety Reversal System (Page 27)
The safety reversal system MUST be tested every month and after ANY adjustments.
- With the door fully open, place a 1-1/2 inch (3.8 cm) board (or a 2x4 laid flat) on the floor, centered under the garage door.
- Press the remote control push button to close the door. The door MUST reverse when it makes contact with the board.
If the door stops but does not reverse: (1) repeat Program the Travel (applying slightly more pressure to the door seal may allow the safety reversal system to be set properly), and (2) repeat the safety reversal test. If the test continues to fail, call a trained door systems technician. It is normal for the trolley to slightly lift the rail with a properly set close limit; ensuring the door is fully closed gives the best opportunity for a successful test.
Step 4: Test the Protector System (Page 27)
- Open the door. Place an obstruction in the path of the door.
- Press the remote control push button to close the door.
The garage door opener will not close from a remote control if the LED in either safety reversing sensor is off or flashing (alerting you that the sensor is misaligned or obstructed).
Source: LiftMaster Installation Manual 114-6151-000, page 27.
Battery Backup
The 6580L has the 12V battery backup (page 28; LiftMaster marks the battery backup "if applicable" in its manual). It allows access in and out of your garage even when the power is out. The battery does not have to be fully charged to operate the opener. When the opener is operating on battery power, it may run slower, and these features are disabled: the garage door opener lights, myQ app control and monitoring, and unattended close including Timer-to-Close.
To reduce the risk of FIRE or INJURY to persons: disconnect ALL electric and battery power BEFORE performing ANY service or maintenance. ALWAYS wear protective gloves and eye protection when changing the battery or working around the battery compartment. The replacement battery listed in the manual's repair parts is LiftMaster part 485LM.
Install the Battery
- Unplug the garage door opener.
- Use a Phillips head screwdriver to remove the side panel on the opener.
- Partially insert the battery into the battery compartment with the terminals facing out.
- Connect the red (+) and black (-) wires from the opener to the corresponding terminals on the battery.
- Replace the battery cover.
- Plug in the garage door opener.
- Wait for the green Battery Status LED to start flashing before proceeding to test the battery.
Test the Battery
Depending on the power level, the battery may need to charge before performing the test. The opener must be unplugged to test the battery.
- Open and close the door using the remote control or door control. While the motor is on, the battery status LED will either glow solid orange, indicating the opener is operating on battery power, or will flash, indicating low battery power. The opener may run slower if the battery is not fully charged.
- Plug in the garage door opener. Verify the battery status LED is flashing green, indicating the battery is charging.
Charge the Battery
The battery charges when the opener is plugged into a 120 Vac electrical outlet that has power, and requires 24 hours to fully charge. A fully charged battery supplies 12 Vdc to the opener for up to 24 hours of normal operation during an electrical power outage. After the electrical power has been restored, the battery will recharge within 24 hours. The battery will last approximately 1 to 2 years with normal usage. Instructions for replacement are provided with the battery. To obtain maximum battery life and prevent damage, disconnect the battery when the opener is unplugged for an extended period of time, such as a summer or winter home.
Battery Status LED
Swipe sideways to see all columns.
| LED | Meaning |
|---|---|
| Green (solid) | All systems are normal. The battery is fully charged. |
| Green (flashing) | All systems are normal. The battery is being charged. |
| Orange (solid while the motor is on) | The opener has lost power and is in battery backup mode, operating on battery power. |
| Orange (flashing while the motor is on) | The battery is low. The opener also beeps every 2 seconds while operating on battery power. |
| Red (solid, with beep) | The battery needs to be replaced; it will no longer hold a charge. Purchase a replacement battery to allow your system to operate during a power outage. |
Source: LiftMaster Installation Manual 114-6151-000, pages 28 and 29.
Operation
Features (Page 31)
- Alert2Close: provides a visual and an audible alert that an unattended door is closing.
- Timer-to-Close (TTC): automatically closes the door after a specified time period that can be adjusted using a TTC enabled control panel (Models L958W or L957W). Prior to and during the door closing, the opener lights flash and the opener beeps. Download the myQ app to use this feature. For sectional doors only.
- myQ app: lets you control and secure your garage door with your mobile device from anywhere once the opener is connected to your Wi-Fi network and your myQ account.
- The Protector System (safety reversing sensors): when properly connected and aligned, the sensors detect an obstruction in the path of the infrared beam. If an obstruction breaks the beam while the door is closing, the door will stop and reverse to the full open position. If the door is fully open and the sensors are not installed or are misaligned, the door will not close from a remote control; you can close it by holding the button on the control panel or keyless entry until the door is fully closed. The sensors do not affect the opening cycle.
- Lights: the opener's integrated LED lights turn on when the opener is initially plugged in, when power is restored after an interruption, or when the opener is activated. The lights turn off automatically after 4-1/2 minutes.
- Battery backup: see Battery Backup. On battery power the opener runs slower, the light will not function, the Battery Status LED glows solid orange, and a beep sounds approximately every 2 seconds.
- Camera: live stream what is happening in your garage with the built-in camera. Connect the opener to Wi-Fi and set up an account with the myQ app.
Using Your Garage Door Opener (Page 31)
When the door is closed and the opener is activated, the door will open. If the door makes contact with an obstruction while opening, the door will stop, the opener beeps, and the lights flash 5 times. When the door is in any position other than closed and the opener is activated, the door will close. If the door makes contact with an obstruction while closing, the door will reverse, the opener beeps, and the lights flash 5 times. The safety reversing sensors must be connected and aligned correctly before the opener will move in the down direction.
Documentation note. The manual's control panel description on page 33 is headed for other models, not the 6580, and its Smart Control Panel menus on page 35 describe a different control panel than the L957W motion detecting control panel listed in the 6580L carton. This page does not reproduce those two pages. The 6580L's control panel programming is on page 36 (see Program a Remote Control), and the L957W's features are summarized in Accessories.
Source: LiftMaster Installation Manual 114-6151-000, page 31.
Set Up the Camera (Page 34)
The manual's camera section lists the 6580 among the models it covers, so it applies to the 6580L. Download the myQ app and set up your account if you have not already, then follow the instructions in the app to set up and use the camera. The manual says the camera powers up when it is opened and powers down when closed. During setup the LED color changes as the camera progresses through each state.
Swipe sideways to see all columns.
| LED | Definition |
|---|---|
| Flashing blue | Camera is attempting to connect to the mobile device. |
| Solid blue | Camera is connected to the mobile device. |
| Flashing blue and green | Camera is attempting to connect to the router. |
| Flashing green | Camera is connected to the router and attempting to connect to the myQ server. |
| Solid white | Camera is powering up. |
| Flashing red | Camera is overheating. |
| Flashing purple | Camera firmware is updating. |
If the camera will not connect to the router, move your router closer to the opener or buy a Wi-Fi range extender; for camera issues, press and hold the reset button on the camera for 10 seconds, then follow the myQ app instructions to set up the camera (page 39). See also Erase the Memory for resetting the camera settings.
Source: LiftMaster Installation Manual 114-6151-000, pages 34 and 39.
Remote Control
Your remote control has been programmed at the factory to operate with your opener (page 35). To add or reprogram a remote control or keyless entry, use one of the methods below.
Program a Remote Control or Keyless Entry (Page 36)
Using the motion detection control panel (L957W)
- Lift the push bar. Press the LEARN button twice (after the second press, the LED on the door control panel will pulse repeatedly).
-
Remote control: within 30 seconds, press and hold the button on the remote control that you wish to use. Release the button when the opener lights flash and/or two clicks are heard.
Keyless entry: within 30 seconds, enter a 4-8 digit personal identification number (PIN) of your choice. Press and hold the HOME button until the opener lights flash and/or two clicks are heard.
Test for success: press the remote button you programmed; the door should activate. If it does not, repeat the programming steps. Alternatively, with the door closed, enter the PIN you programmed and press the HOME button; the door will then open. If it does not open, repeat the programming steps.
Using the garage door opener LEARN button
- Locate the LEARN button.
- Press and immediately release the LEARN button. The LEARN LED will glow steady for 30 seconds.
-
Remote control: press and hold the button on the remote control that you wish to use.
Keyless entry: enter a 4 to 8 digit personal identification number (PIN) of your choice on the keyless entry keypad, then press and hold the HOME button. - Release the button when the opener lights blink or two clicks are heard.
Source: LiftMaster Installation Manual 114-6151-000, pages 35 and 36.
Erase the Memory (Page 36)
Erase all remote controls and keyless entries
- Press and hold the LEARN button on the opener until the LEARN LED goes out (approximately 6 seconds). All remote control and keyless entry codes are now erased. Reprogram any accessory you wish to use.
Erase all devices, including myQ enabled accessories
- Press and hold the LEARN button on the opener until the LEARN LED goes out (approximately 6 seconds).
- Immediately press and hold the LEARN button again until the LEARN LED goes out. All codes are now erased. Reprogram any accessory you wish to use.
Erase the connection from the opener to the home Wi-Fi network
- Press and hold the black adjustment button on the opener until 3 beeps are heard (approximately 6 seconds).
Erase the camera settings
- Press and hold the black adjustment button on the opener until 3 beeps are heard (approximately 6 seconds). The LED light will turn off, then flash red. You will need to set up both the opener and the camera again after resetting it.
Open the Door Manually (Page 36)
To prevent possible SERIOUS INJURY or DEATH from a falling garage door: if possible, use the emergency release handle to disengage the trolley ONLY when the garage door is CLOSED. Weak or broken springs or an unbalanced door could result in an open door falling rapidly and/or unexpectedly. NEVER use the emergency release handle unless the garage doorway is clear of persons and obstructions. NEVER use the handle to pull the door open or closed.
Disconnect the trolley
- The door should be fully closed if possible.
- Pull down on the emergency release handle.
Reconnect the trolley (lockout feature)
The lockout feature prevents the trolley from reconnecting automatically.
- Pull the emergency release handle down and back (toward the opener). The door can then be raised and lowered manually as often as necessary.
- To disengage the lockout feature, pull the handle straight down. The trolley will reconnect on the next UP or DOWN operation, either manually or by using the control panel or remote control.
Source: LiftMaster Installation Manual 114-6151-000, page 36.
Maintenance and Troubleshooting
Maintenance Schedule (Page 37)
Swipe sideways to see all columns.
| How often | Task |
|---|---|
| Every month | Manually operate the door. If it is unbalanced or binding, call a trained door systems technician. Check that the door opens and closes fully; adjust if necessary (see page 26). Test the safety reversal system; adjust if necessary (see page 27). |
| Every year | Oil door rollers, bearings and hinges. The garage door opener does not require additional lubrication. Do not grease the door tracks. Test the battery and consider replacing it so the opener will operate during an electrical power outage (see page 28 to test the battery backup). |
| Every two to three years | Use a rag to wipe away the existing grease from the opener rail. Reapply a small layer of white lithium grease to the top and underside of the rail surface where the trolley slides. |
The Remote Control Battery (Page 37)
To prevent possible SERIOUS INJURY or DEATH: NEVER allow small children near batteries, and if a battery is swallowed, immediately notify a doctor. To reduce the risk of fire, explosion or chemical burn, replace ONLY with 3V CR2032 coin batteries, and DO NOT recharge, disassemble, heat above 212°F (100°C) or incinerate.
LiftMaster's illustration shows how to replace the remote control battery: unscrew the captive screw, pry open the top housing and lift up, remove the old battery from the holder and replace it with a new battery, then re-attach the top housing and tighten the captive screw.
Diagnostic Chart (Page 38)
The opener is programmed with self-diagnostic capabilities. The UP and DOWN arrows on the garage door opener flash the diagnostic codes. Codes are shown here as UP arrow flashes and DOWN arrow flashes.
Swipe sideways to see all columns.
| UP flashes | DOWN flashes | Symptom | Solution (LiftMaster) |
|---|---|---|---|
| 1 | 1 | The garage door opener will not close. | Safety reversing sensors are not installed, connected, or wires may be cut. Inspect the sensor wires for a disconnected or cut wire. |
| 1 | 2 | The garage door opener will not close. | There is a short or reversed wire for the safety reversing sensors. Inspect the safety sensor wire at all staple and connection points; replace wire or correct as needed. |
| 1 | 3 | The control panel will not function. | The wires for the control panel are shorted or the control panel is faulty. Inspect control panel wires at all staple and connection points; replace wire or correct as needed. |
| 1 | 4 | The garage door opener will not close. | Safety reversing sensors are misaligned or were momentarily obstructed. Realign both sensors until both LEDs are glowing steady. Make sure nothing is hanging or mounted on the door that would interrupt the sensor path while closing. |
| 1 | 5 | Door moves 6-8" (15-20 cm), stops or reverses. | Manually open and close the door. Check for binding or obstructions, such as a broken spring or door lock; correct as needed. Check wiring connections at the travel module and at the logic board. Replace the travel module if necessary. |
| 1 | 5 | No movement, only a single click. | Manually open and close the door. Check for binding or obstructions, such as a broken spring or door lock; correct as needed. Replace the logic board if necessary. |
| 1 | 5 | Opener hums for 1-2 seconds, no movement. | Manually open and close the door. Check for binding or obstructions, such as a broken spring or door lock; correct as needed. Replace the motor if necessary. |
| 2 | 1 to 5 | No movement, or sound. | Replace the logic board. |
| 3 | 2 | Unable to set the travel or retain position. | Check the travel module for proper assembly; replace if necessary. |
| 3 | 3 | The battery status LED is constantly flashing green. | Battery backup charging circuit error; replace the logic board. |
| 4 | 1 to 4 | Door is moving, stops or reverses. Opener beeps and lights flash. | Manually open and close the door. Check for binding or obstructions, such as a broken spring or door lock; correct as needed. If the door is binding or sticking, contact a trained door systems technician. If the door is not binding or sticking, attempt to reprogram the travel (see page 26). |
| 4 | 5 | Opener runs approximately 6-8" (15-20 cm), stops and reverses. | Communication error to the travel module. Check the travel module connections; replace the travel module if necessary. |
| 4 | 6 | The garage door opener will not close. | Safety reversing sensors are misaligned or were momentarily obstructed. Realign both sensors to ensure both LEDs are steady and not flickering. Make sure nothing is hanging or mounted on the door that would interrupt the sensor path while closing. |
Troubleshooting (Page 39)
Swipe sideways to see all columns.
| Symptom | LiftMaster's guidance |
|---|---|
| The opener will not enter Wi-Fi learn mode | After the initial installation, the opener must complete a full cycle (open and closed) before Wi-Fi learn mode can be activated. If there has been a recent power outage, the opener must complete a full cycle before Wi-Fi learn mode can be activated. |
| Cannot connect the opener to the home Wi-Fi network | Ensure the myQ serial number was entered correctly and try again (the myQ characters are A-F and 0-9 only). If the Wi-Fi signal in the garage is weak, ensure it is reaching the garage, or visit support.chamberlaingroup.com. |
| My door will not close and the work lights flash 10 times | The safety reversing sensor must be connected and aligned correctly before the opener will move in the down direction. Verify the sensors are properly installed, aligned and free of obstructions. If the receiving sensor (green LED) faces direct sunlight, switch the receiving sensor with the sending sensor. |
| The LEDs are not working | Check the wiring on both integrated LED light modules to the connector; if loose, reconnect. If the lights do not turn on, a new integrated LED light module may be needed. Visit the support page or a certified door professional to determine if a new module is needed. |
| My neighbor's remote control opens my garage door | Erase the memory from your opener and reprogram the remote control(s). |
| My vehicle's HomeLink is not programming to my opener | The opener is compatible with HomeLink versions 4, 5 and 6. Contact HomeLink at 1-800-355-3515 or www.HomeLink.com. |
| My camera will not connect to the router | Move your router closer to the opener to minimize interference from walls and other objects, or buy a Wi-Fi range extender. For camera issues, press and hold the reset button on the camera for 10 seconds, then follow the myQ app instructions to set up the camera. |
Source: LiftMaster Installation Manual 114-6151-000, pages 37 to 39.
Compatible Accessories
LiftMaster's accessories page (page 40) lists these accessories for its openers. The opener is compatible with myQ and Security+ 3.0 accessories, and older control panels and third party products are not compatible (page 18).
Swipe sideways to see all columns.
| Model | Accessory | LiftMaster's description |
|---|---|---|
| L957W | Motion detecting control panel | Multi-function control panel with a motion sensor that automatically turns opener lights on when it detects a person entering the garage. Security+ 3.0 and Wi-Fi compatible. |
| L958W | Smart control panel | Displays temperature, time and system diagnostics; includes a push bar to open and close the door and a lock feature for extra security. Security+ 3.0 and Wi-Fi compatible. |
| L956W | Multi-function control panel | Compatible with Security+ 3.0 openers. |
| L979M | MAX wireless keyless entry | For use outside of the home to enable access to the garage using a 4-digit PIN. Works with ALL LiftMaster openers from 1997 to present. Download the myQ app for more information. |
| L993M | 3-button MAX remote control | Compatible with LiftMaster garage door openers manufactured since 1997. Includes visor clip. |
| L991S | 1-button STD remote control | Compatible with Security+ 3.0 devices. |
| L992U | Universal remote control | Can be programmed to activate up to two products, such as a garage door opener, gate operator, or commercial door operator. Compatible with LiftMaster garage door openers manufactured since 1997. Includes visor clip. |
Shop related items: garage door opener accessories | remotes and receivers | keypads
Source: LiftMaster Installation Manual 114-6151-000, page 40.
Repair Parts
The tables below list the 6580L repair parts and part numbers as printed by LiftMaster on pages 48 and 49 of manual 114-6151-000. The links open related All Security Equipment category pages and do not by themselves confirm that we stock a part or that it fits your opener.
Assembly Parts, Model 6580L (Page 48)
Swipe sideways to see all columns.
| Item | Description | Part number |
|---|---|---|
| 1 | Belt, for 7 foot door | 041A5434-11A |
| 1 | Belt, for 8 foot door | 041A5434-13A |
| 1 | Belt, for 10 foot door | 041A5434-14A |
| 2 | Belt pulley bracket | 041B5424 |
| 3 | Master link | 004A1008 |
| 4 | One-piece rail, 7 feet (2.1 m) | 2777BD |
| 4 | One-piece rail, 8 feet (2.4 m) | 2778BD |
| 4 | One-piece rail, 10 feet (3 m) | 2770BD |
| 5 | Trolley assembly (includes master link (2), clevis pin (1), ring (1), belt clip (1), threaded shaft (1), and tensioner assembly (1)) | 041B3869-3A |
| 6 | Spring trolley nut | 041B4103 |
| 7 | Trolley threaded shaft | 041A6689 |
Installation Parts (Page 48)
Swipe sideways to see all columns.
| Item | Description | Part number |
|---|---|---|
| 1 | Curved door arm | 041B0035B |
| 2 | Door bracket with clevis pin and fastener | 041A5047-1 |
| 3 | Emergency release rope and handle | 041A2828 |
| 4 | Header bracket with clevis pin and fastener | 041A4353-1 |
| 5 | Remote control visor clip | 041-0494-000 |
| 6 | Safety sensor bracket | 041-0155-000 |
| 7 | Safety sensor kit with receiving and sending sensors with 3 feet (.9 m) 2-conductor wire | 041-0136 |
| 8 | Straight door arm | 4178B0034B |
| 9 | White and red/white wire | 041B4494-1 |
| 10 | 3V CR2032 lithium battery | K010A0020 |
| 11 | Extension bracket (optional) | 041A5281-1 |
| 12 | Remote control | L993M |
| Not shown | Installation hardware bag | 041A2770-17 |
| Not shown | Multi-function control panel | L957W |
Garage Door Opener Parts, 6580 (Page 49)
Swipe sideways to see all columns.
| Item | Description | Part number |
|---|---|---|
| 1 | Belt cap retainer | 041C1751 |
| 2 | Sprocket | 041B5348-2 |
| 3 | End panel | 041-0184-000 |
| 4 | Dual light pod kit | 041-0188-000 |
| 5 | Badge | 041-0196-000 |
| 6 | Main enclosure cover | 041-0191-000 |
| 7 | Control door panel | 041-0192-000 |
| 8 | End panel cover | 041-0194-000 |
| 9 | Motor with travel module | 041D0794-1 |
| 10 | Travel module | 041D0871-4 |
| 11 | Logic board end panel | 041-0503-000 |
| 12 | Logic board | 030DCT |
| 13 | Line cord | 041-0505-000 |
| 14 | Camera | 041-0506-000 |
| 15 | Backup battery | 485LM |
| Not shown | Wire harness | 041-0180-000 |
| Not shown | Camera wire harness | 041-0349-000 |
| Not shown | Transformer, Wi-Fi | 041D0277-2 |
Shop related items: garage door opener parts | garage door opener accessories | batteries
Source: LiftMaster Installation Manual 114-6151-000, pages 48 and 49.
Warranty
Per LiftMaster's limited warranty (page 41), LiftMaster ("Seller") warrants to the first retail purchaser of the product, for the residence in which it is originally installed, that it is free from defects in materials and/or workmanship for the periods below, starting from the date of purchase. The warranty table in the manual has rows for other models; the row for the 6580 is shown here.
Swipe sideways to see all columns.
| Model | Parts | Motor | Accessories | Belt | Battery backup | Integrated LED | Camera |
|---|---|---|---|---|---|---|---|
| 6580 | 1 year | 6 years | 1 year | 6 years | 1 year | 1 year | 1 year |
Proper operation depends on complying with the instructions for installation, operation, maintenance, and testing; failure to comply strictly will void the limited warranty in its entirety. The warranty does not cover non-defect damage, damage from improper installation, operation, or care, labor charges for reinstalling a repaired or replaced unit, replacement of consumable items (such as batteries in remote control transmitters), units installed for non-residential use, any problems with the garage door or its hardware (springs, rollers, alignment, hinges), or problems caused by interference. The complete terms are printed on page 41.
All Security Equipment note. Our 6580L product page lists the same warranty periods: 6 years for the motor and belt, 1 year for the LED and parts, and 1 year for the battery, camera, and accessories. If you bought your opener from All Security Equipment, see our refund policy and our Help Center for how manufacturer warranty returns are handled.
Source: LiftMaster Installation Manual 114-6151-000, page 41.
Automatic Garage Door Opener Safety and Maintenance Guide
Pages 42 and 43 of the manual are a general safety and maintenance guide.
Garage Door Opener Safety: An Automatic Decision
LiftMaster says a garage door is the largest moving object in the home. An improperly adjusted garage door and opener can exert deadly force when the door closes, which could lead to entrapment of children or adults and subsequent injury or death. Key points:
- Garage door openers are not toys. Discuss safety with your children and explain the danger of being trapped under the door. Stay away from a moving door.
- Keep transmitters and remote controls out of reach of children.
- The wall-mounted push button should be out of reach of children, at least 5 feet from the nearest standing surface and away from all moving parts. Mount and use it where you can clearly see the closing door, and keep the door in sight until it completely closes.
Routine Maintenance Can Prevent Tragedies
Make monthly inspection and testing of your garage door and opener system part of your routine. Warning (LiftMaster): springs are under high tension. Do not loosen or adjust any bottom brackets, red colored fasteners, cables, or supports; only trained technicians should adjust these components.
- Visually check the door and installation: with the door closed, use the manual disconnect on the opener to disconnect the door; look for wear or damage on hinges, rollers, springs, and door panels; contact a trained door systems technician if damage is evident; and verify the photo eye height is no higher than 6 inches from the floor.
- Test the door: open and close it manually. It should move freely and without difficulty, and should balance and stay partially open 3-4 feet above the floor.
- Test the opener safety features: reconnect the opener and open the door. Place a 2x4 flat in the path of the door and try to close it; the door should stop on contact and then reverse. Block the photoelectric sensor by waving an object in front of it and attempt to close the door; the door should not close unless the wall-mounted push button is manually held. If the opener does not perform as described, contact a trained door systems technician.
Source: LiftMaster Installation Manual 114-6151-000, pages 42 and 43.
Frequently Asked Questions About the LiftMaster 6580L
What is the Plus Series?
LiftMaster sells residential garage door openers in Basic, Plus, and Premium series. The Plus Series has one model, the 6580L.
What comes with the 6580L?
Per our product page: a three-button transmitter (L993M), a motion-detection control panel (L957W), and the battery backup (485LM). The manual's carton inventory also lists the rail, belt, brackets, door arms, trolley, emergency release rope and handle, safety reversing sensors, labels, and hardware. See Carton Inventory.
Does the 6580L have a camera and battery backup?
Yes. The manual's camera section covers the 6580, and the manual lists a camera (041-0506-000) and a backup battery (485LM) in the 6580L parts. See Set Up the Camera and Battery Backup.
What Wi-Fi does the opener need?
A 2.4 GHz, 802.11b/g/n signal in the garage, your home network password, and the myQ serial number from the opener (pages 4 and 32). See Wi-Fi and myQ App Connection.
How do I program a remote or keypad?
Lift the push bar on the control panel and press LEARN twice, or press the opener's LEARN button once, then press and hold the remote button (or enter a 4-8 digit PIN and press HOME) (page 36). See Program a Remote Control.
How do I set the open and close positions?
Hold the Adjustment button until the UP button flashes, set the UP position, press Adjustment, set the DOWN position, and press Adjustment again; the opener then sets the force automatically (page 26). Test safety reversal afterward. See Program the Travel.
Why won't my door close, and the lights flash 10 times?
The safety reversing sensors must be connected and aligned before the opener will move down (pages 20, 25, and 39). See Safety Sensor Troubleshooting.
What do the UP and DOWN arrow flashes mean?
They are the opener's diagnostic codes; see the Diagnostic Chart (page 38).
What stops working on battery power?
The opener lights, myQ app control and monitoring, and unattended close including Timer-to-Close, and the opener may run slower (page 28). See Battery Backup.
How do I open the door by hand?
Pull down on the emergency release handle, preferably with the door fully closed; pulling it down and back engages the lockout feature (page 36). See Open the Door Manually.
Can I use Timer-to-Close or the myQ app with a one-piece door?
No. Unattended close features, including Timer-to-Close and the myQ app, are to be used ONLY with sectional doors (page 3).
What warranty does the 6580L have?
6 years on the motor and belt, and 1 year on parts, accessories, battery backup, integrated LED, and camera (page 41). See Warranty.
Is the manual available in other languages?
The PDF has the English manual first (pages 1 to 49), followed by other languages. This page presents the English version.
Original LiftMaster Documentation
This HTML resource is presented by All Security Equipment, is not a LiftMaster publication, and does not replace the original manufacturer documentation. It is based on LiftMaster's Installation Manual for Smart LED Garage Door Openers, document 114-6151-000, ©2025 The Chamberlain Group LLC.
- LiftMaster Installation Manual 114-6151-000: the document this page is based on (English on pages 1 to 49).
- LiftMaster 6580L product page at All Security Equipment
Check LiftMaster's product page for the current revision before relying on any document, because LiftMaster may update them.
Related Resources
- Residential garage door operators
- Garage door openers
- Garage door opener accessories
- Garage door opener parts
- All LiftMaster products
Need the opener itself? All Security Equipment sells the LiftMaster 6580L Plus Series garage door opener.
This resource was last updated November 19, 2026. Based on LiftMaster document 114-6151-000.